How does respawn work?
In most top-down games, your character can take damage, and eventually die if its health reaches zero. In the TopDown Engine that’s also the default behaviour. When your character takes damage, a relatively complex chain of events starts :
- your character takes X damage, this is handled by the Health component of your character
- it loses X health
- if its health goes below zero, the Health component calls its Kill() method and tells the LevelManager that the player is dead
- the LevelManager resets the level, triggering the Respawn of the player and potentially other objects within the scene
That Respawn is done by checking what checkpoint the player last reached, repositioning the player there, and also respawning all the objects registered to that checkpoint. Checkpoints have a CheckPointOrder value assigned to them in their inspector. That order will define in what order they should be reached. You can also ForceAssignation on them, meaning that a character entering a ForceAssignation checkpoint will consider that checkpoint to be the last it went through.
If you want your enemies or objects to respawn, just put an Autorespawn component on them.
Checkpoints
Creating and placing checkpoints in the TopDown Engine is extremely simple. All you have to do is create an empty game object, and add a Checkpoint component to it. It will also need a Collider component, either 2D or 3D depending on what kind of characters you’re working with. The shape of it doesn’t matter, it can be a BoxCollider, a CircleCollider, a SphereCollider, etc… Make sure you set its IsTrigger setting to true.
All you have to do then is change the Collider’s size. That size will determine the zone that will trigger the checkpoint, make it big enough so that your character won’t miss it. You can also set the facing direction from the Checkpoint component’s inspector. That’s the direction your player character will be facing when respawing.
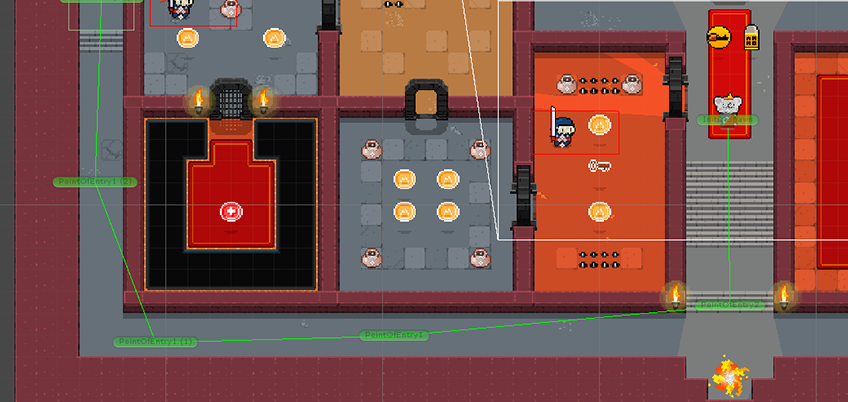
You can then position your checkpoint in your scene, and add a few more. One last thing you can do is set the CheckPointOrder in the checkpoint’s inspector. Checkpoints should be numbered in ascending order. When you press play, you’ll see all your checkpoints linked by a green line in the order they’ll have to be crossed.