Introduction
Like for any other Unity project, you’ll need a Camera (or more) in your level to see the action. The TopDown Engine includes a few Camera specific scripts. Note that you can use any Camera script with the asset, or implement your own, or build on top of the provided scripts. There’s nothing mandatory here and you can do whatever you want. This page covers the main scripts and how to use them.
Regular and UI Cameras

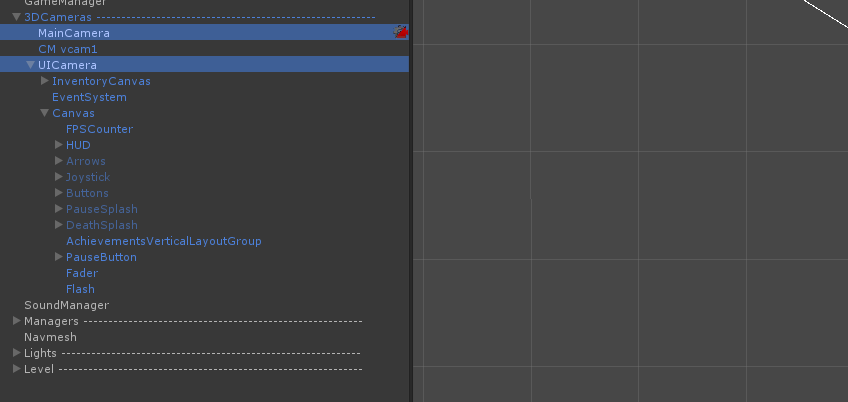
By default, in most demo scenes of the TopDown Engine, you’ll notice a camera rig : a transform holding a regular camera (2D, 3D, following the player or not, etc) and a UI Camera. The UI Camera’s Culling Mask is set on UI, which means it’ll only render UI tagged stuff, and is setup to be superimposed over the main camera’s render. It contains one or more canvases, and on them you’ll find buttons, screens, etc. The MainCamera is a regular Unity camera, and in most demos the engine uses Unity’s amazing Cinemachine to drive it.
Cinemachine
The engine relies on Cinemachine to handle cameras base behaviour. It’s a beautiful and powerful tool, that should cover all your needs when it comes to camera movement and behaviour. This documentation doesn’t cover how to use Cinemachine, as its own documentation does that perfectly well.
The only specifics to the TopDownEngine are these components, added to the virtual camera :
- the use of a Cinemachine Confiner, automatically set to the LevelManager’s bounds on start, so you don’t have to worry about it.
- an MMCinemachineCameraShaker, used to catch camera shake events and move the virtual camera around in shake patterns.
- a CinemachineCameraController, a minimal class that allows you to turn following on or off
Note that most Cinemachine Virtual Cameras in the demos use some form of Noise on them, which makes the camera move constantly, simulating a handheld camera. This is for purely cosmetics purposes, and if you don’t like it, you can (and should) remove it by selecting your virtual camera and settings its Noise dropdown to “None”.
Pixel Perfect
For 2D scenes where you want pixel perfect behaviour from the camera, the engine relies on Unity’s native Pixel Perfect Camera component to provide crisp visuals. Check out its documentation for more details on how to use it. You can also see it in use in the Koala Dungeon demo scene.
PostProcessing
The TopDown Engine relies on Unity’s excellent PostProcessing stack for post processing effects. Don’t hesitate to check its documentation for more info on how to take full advantage of it.
Camera Rotation
While the TopDown Engine focuses on top down action games, which traditionally feature a non rotating camera, the engine comes with a dedicated ability, CharacterRotateCamera, that will let you rotate the camera on the vertical axis (z in 2D, y in 3D) around your character. It comes with options to also rotate input to match the camera’s direction, determine rotation space and speed, and a dedicated aim option for weapons. You’ll find an example of it in action in the Loft3D demo scene (use L and M to rotate the camera). While possible, more advanced camera movements (third person view, etc) are not built into the engine, which focuses solely on top down action games.
Setting up an isometric camera view in a 3D scene
- in Unity 6000.0.23f1 (or higher), create a new project and import TopDown Engine v4.5 via the Package Manager, open MinimalScene3D
- select the CM vcam1, set its y rotation to 45. on its CinemachineCameraController, uncheck ConfineCameraToLevelBounds and ListenToSetConfinerEvents (this isn’t mandatory but will look better)
- press play, press up, notice the character moves north in the context of the scene, and not vertically from the point of view of our now rotated camera. exit play mode, and let’s fix that.
- select the MinimalCharacter prefab in your Project panel, add the CharacterRotateCamera component to it
- press play in the editor, then press up, and notice the character now moves north east, vertically from the point of view of the camera