Introduction
Every character in the engine will need a number of components to work. Some of them are specifics to 2D, some of them to 3D. Most of them are common. This page will give you information on the major ones, that you need to know to create characters smoothly in the TopDown Engine.
2D-specific components
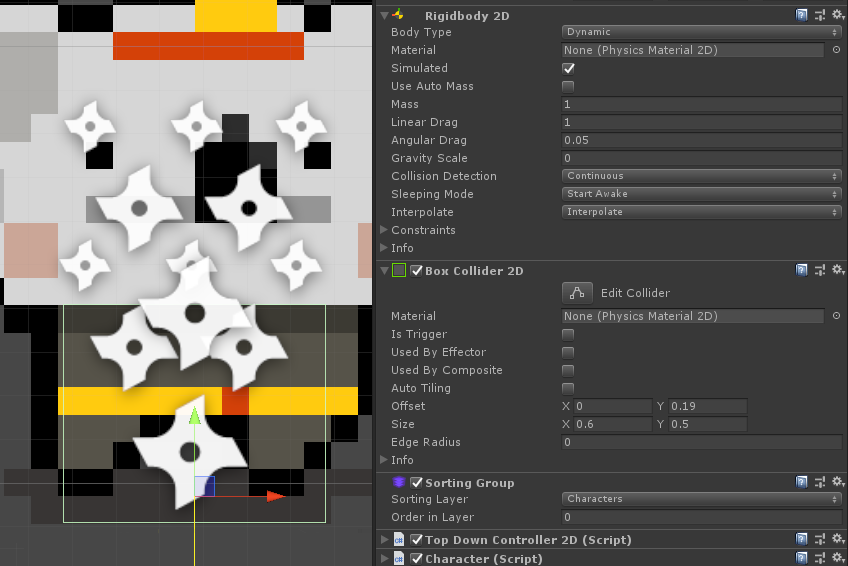
If you’re going for a 2D character, you’ll need a RigidBody2D component (Dynamic, Continuous Collision Detection, Start Awake, Interpolate), as well as a BoxCollider2D (non trigger). There’s no rule or obligation when it comes to setting up that collider, but I like to have mine encompassing half of the bottom part of the character, like in the image above. This will allow the head of the character to get in front of walls above it, and generally gives a good illusion of the position the character occupies on the “ground”.
Additionnally, you may want to use a SortingGroup component, set to the Character sorting layer. This will automatically handle sorting so that your character appears “behind” objects that are lower on the Y axis, and “in front” of objects that are above it.
3D-specific components
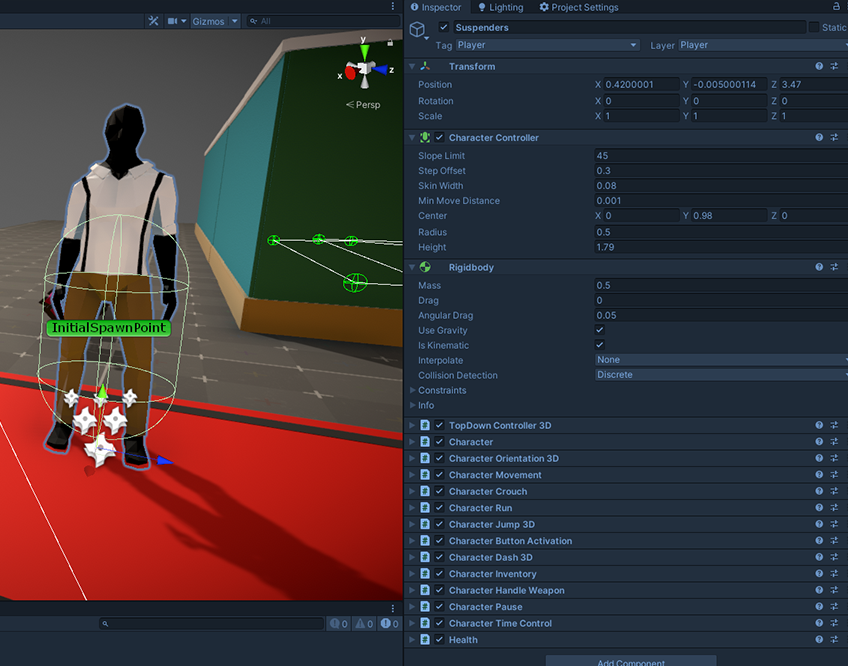
If you’re going for a 3D character, you’ll need a RigidBody (kinematic, uses gravity, Discrete Collision Detection) and a Character Controller.
TopDown Controller
Then your character will need a TopDownController. Pick either the TopDownController2D or TopDownController3D version, not the base one. Both have slightly different settings, but mostly you’ll want to make sure that the layer masks are properly set (the layers the controller should consider as ground, walls, etc). Both controllers are designed to provide tight, responsive controls. Out of the box you won’t be able to use root motion in 3D, by design. It’s possible of course, and if you feel like you really want to, the recommended way would be to extend the TopDown Controller 3D to add support for it.
Character
This is the central class that will link all the others. It doesn’t do much in itself, but really acts as a central point. That’s where you define if the player is an AI or player-controlled, where its model and animator are located, stuff like that. It’s also the class that will control all Character Abilities at runtime.
It’s a very central class. From its inspector you’ll be able to define a few things. If it’s a player character, the PlayerID field is very important. It has to match exactly the one in your InputManager (that’s how the InputManager knows what characters to control).
Health
The Health component handles damage, health gain/loss, and eventually death (and rebirth). It’s mandatory if your character can take damage. Its various methods will allow you to remove / add health points from the initial health value, it’ll handle damage and the associated effects (visual and in terms of collisions etc).
Character Abilities
The last (but not least important) part of your character will be the Character Abilities. The asset comes packed with more than 15 abilities, from simple ones like CharacterMovement to more complex ones like weapon handling. They’re all optional, and you can pick whichever you want. You can of course also easily create your own abilities to build your very own game. You can check this page for more details about Character Abilities.
Hierarchy
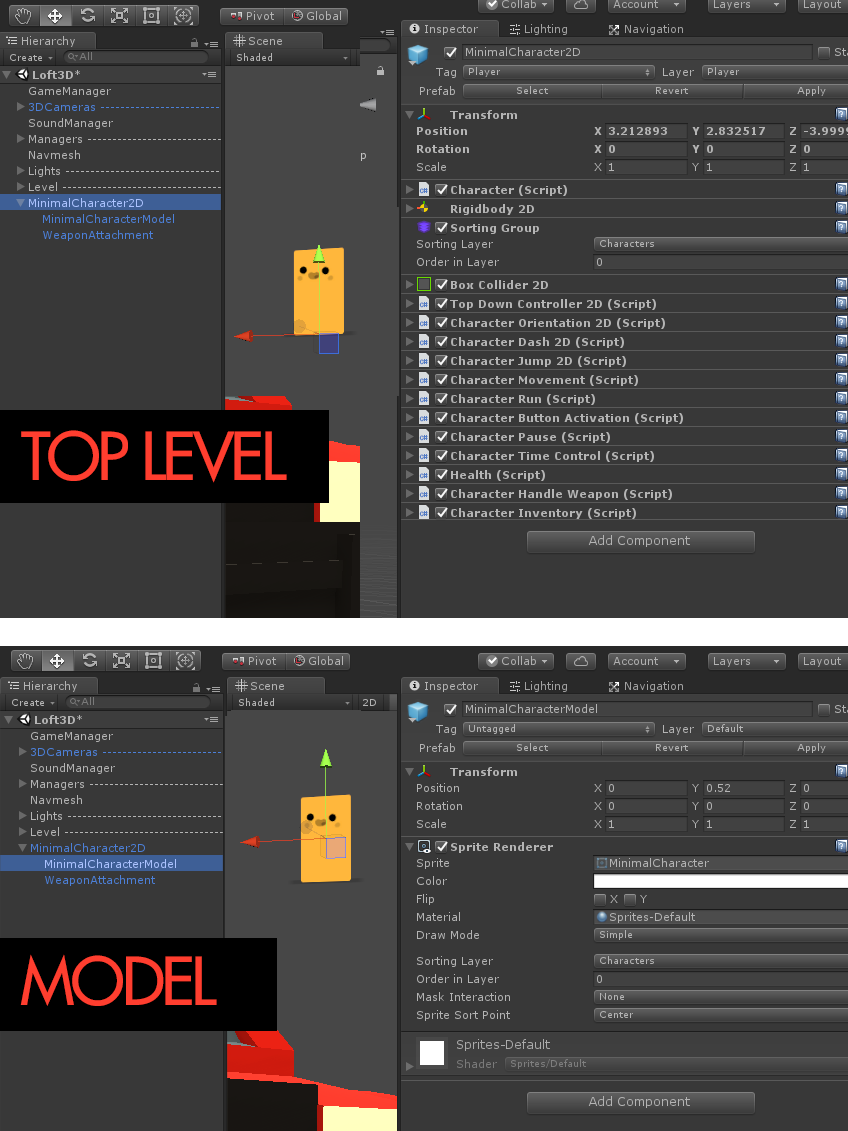
However you create your character, one thing that is really important is to understand how to structure it. You’ll want to separate the logic (the RigidBody, TopDownController, Character abilities, etc) from the visuals (your model / sprite / Spine setup, etc). You can have many more layers (maybe your animator sits on its own layer, etc), but the recommended setup is the one on the image above : a top level with all the logic, and the model nested inside it.
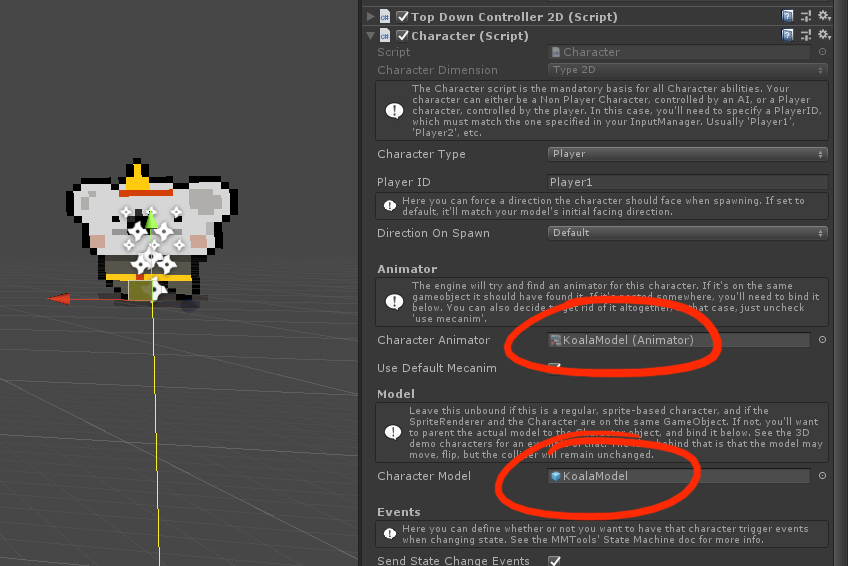
Make sure you link the Model to the Character class, same for the animator, from the inspector. Some other classes (Orientation abilities, Health) may also require you to tell them, via their inspector, where the Model or Animator is.